Search This Blog

Friday, December 10, 2010

Check it out

I have been featured on a fun little blog called Better After. They have lots of great before and after shots of all kinds of things from rooms to furniture!


Update: I was also featured at UglythenPretty- What a fun surprise!


Monday, November 15, 2010

Advent Garland

A few years ago, I made an advent garland for my friend Emily. Secretly, I wanted to keep it for myself, but I think she appreciated it. Ever since then, I have wanted to make another, but didn't want it to be exactly the same. Her's is made up of little squares with flaps that you close with buttons so I decided to go with stockings and just make loops out of ric rac to hang them on the ribbon.

This is a super easy project, but it does take a little time. I finished most of this while watching the Aggies beat Baylor this weekend (Whoop)! Shameless plug, I know!!

Here's what you need:

10 pieces of felt. I used white and red
embroidery thread in contrasting colors to the felt
glitter glue or even a fabric marker for the numbers
Ribbon-
2 inch roll for the actual garland and another thinner ribbon to tie the stocking on with
Ric Rac
Hot glue

First I found a pattern online for a small stocking. I folded the felt in half and traced 3 stockings on each piece. You will have a few left over in case you mess up!


After I cut them out, I just did a simple stitch around the edges, leaving the top open. This is the part that takes the longest.

Once you have all your stockings, glue the ric rac to the top of the front piece only. I just made a loop as I was gluing.

Them use your markers, puff paint, or whatever and write your numbers on each stocking.


Once they are dry, use the smaller ribbon to tie each stocking onto the thicker ribbon evenly spacing them however you like!

And there you have it! Come Christmas, I will put mini candy canes or something else like that in each stocking so we can count down to Christmas!

Now if only I had a mantle to hang it on!!!

Friday, October 29, 2010

A reminder


I made this sign for my mom. She just started a new job, a promotion for her, and with that comes more responsibility. She admits she can get a little anxious sometimes and wanted something in her office to look at as a reminder to trust in the Lord at all times. I hope this helps!


* sorry the picture is bad, its from my phone!

The wood came from the "as is" section in Ikea. I think it was a cabinet door or something. I wanted a little of the original wood to come through so I put the vinyl letters down before I spray painted it the brown color. Once dry, I peeled the letters off. I wanted to accent some of the words, so I used scrapbook paper and modge podge for those. After I had all the letters where I wanted them, I coated it with a spray poly to protect it!

It took awhile to get the spacing right, but I think it works.

Mom, I am so proud of you for taking on a new challenge. I know you will do a great job and I hope this helps you remember that GOD is with you always!!


Monday, October 11, 2010

A Clock

My Mom was in town this weekend. We don't often have time to ourselves without an agenda, so it was nice to spend 4 days with her just doing whatever we wanted to! We went shopping, did some baking, ate lots of meal out, went to a concert and rested.

But we also did some much needed things around my house. My mom is a super-organizer. She always says she wished she could organize for a job, but now I am lucky enough to get her skills free of charge! She organized my pantry and refrigerator. They look awesome and now I can actually see what I have in there. I don't think I need to go grocery shopping any time soon!

I was also able to complete a project I had been thinking about for a little bit. I had this blank wall in my living room once I rearranged the furniture. Nothing I currently had decor wise looked good there so I had to come up with something inexpensive and fairly large to take up the space.

I got to thinking that we needed a new clock because the one we had wasn't working anymore. But clocks are expensive and I would need a pretty big one. So off to Hobby Lobby I went and was able to buy all the pieces I would need for a clock for about $10!

I cut out the numbers with my Cricut machine and put them directly on the wall. To assemble the clock, I just used a piece of round wood with a hole drilled in the middle for the hands to go and followed the assembly directions on the clock mechanism from there.

I think it turned out really nice. The hardest part was spacing the numbers right, but I used a string and a thumb tack to help me trace a circle on the wall and that worked pretty well!

Now I have a awesome clock that can come down any time I want it to- and it was only $10!!


Friday, October 8, 2010

Random

* This is a post I previously had on my personal blog. I thought it fit better here.
********************************
It all started when I got the urge to re-arrange my bedroom and add some fun accessories

The curtains were hand-me-downs from Emily and the tie backs were made from a wooden block and some kind of knob I found at Hobby Lobby.
These are just fabric covered canvases. The fabric was from the as-is section of Ikea and the canvases came from my neighbors trash!


The new arrangement also created some space for a much needed extra dresser!!
The search led me to this awesome thrift store…Where I found a dresser
and with a little paint…
Went from this…


To this…


I also got this fun lamp


and after only one minor electrical shock,


I was able to re-wire and hang to use as a bed-side light!
People either love it or hate it, I LOVE IT!


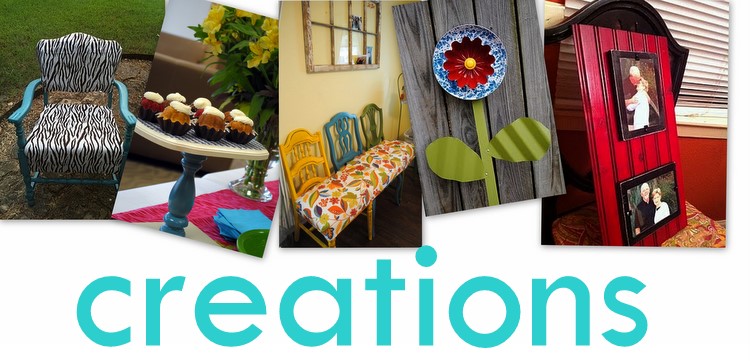
A few weeks later, I went back to the thrift store and got this cool chair…..


After a few coats of spray paint and some fabric from an old pillow, it now looks like this…


I put it in an empty corner of our living room and then had to paint this mirror to match…


I decided that doing stuff like this is a release for me. Some people have sports, others have TV-I have crafts!

Oh, somewhere in the middle of all this I made this picture frame for a wedding shower gift… cute huh!


Tuesday, October 5, 2010

Living Room re-do!

What do you get when you combine a roll of painters tape
with 2 of these


and a can of this?


You get this:

6 curtain panels for my newly painted living room.

These were definitely inspired by The Nesters curtains and my friend Laura tipped me off on the idea to paint them.

I love the height and the drama they add. Even my home-decorating challenged roommates like them! And that's saying something!

This was such an easy project, the hardest part was just getting the stripes even. Each drop cloth made 3 panels so in total I think this project was about $30. Way cheaper than buying 6 panels- especially ones that length!

The picture is not the best, but trust me- they look great!!!


Tuesday, September 21, 2010

After

Here is the finished product...


I went with what I thought was a grey/beige color on the chairs. But once I glazed them, they turned out to be this purpley/grey color that I really love.
The fabric was a split decision, but I ended up really loving it too. The pictures don't really do it justice, its actually a really toned down blue with brown trim. Trust me- it looks good!


I put them in my office along with this thrift store table that just needed a little spray paint.

Now all I need are some fun decorations, a wall hanging I am currently imagining in my mind and maybe curtains, and my office will be complete!

Wednesday, September 15, 2010

Before


I just scored 2 of these awesome chairs for $9 total!


They are going in my new office that is in desparate need of some flare!
I'm not positive on what kind of fabric I want to use...
any suggestions?

Wednesday, August 25, 2010

New chair


This chair was in danger of finding it's final resting place in the local trash dump.
But I saw beyond the outward appearance and recognized the potential.
With a little love, a lot of staples and paint, the once abandoned chair has found a new home in my living room!


I choose the fabric in honor of Africa! Plus. I think I heard animal print is so in right now!!

Tuesday, May 25, 2010

Vanity Re-Do

"This vanity was red,
and now it's blue

But in between
it was 5 other colors too"


I had this really cool vanity that I got a while back. On a whim, I painted it red one day and didn't really bother to do it the right way. I didn't even put poly on it. Not a good idea! In about a month, the paint was chipping and the top was stained from all my mineral makeup! I never really liked the red anyways, so I decided to re-do it again.

I started by priming the bottom half, I knew I just wanted to paint it anyways. Kilz primer is awesome!!! It only took one coat to cover over all that red!


I then used a stripping formula on the top part. The red came off pretty easy, and the white underneath (the color it was when I got it) took some elbow grease, but it wasn't too bad either. What I wasn't prepared for was the 4 other layers of paint and stain under that. It seems whoever had this before me took my original approach to re-furnishing. Just paint over it and get on with life!


It took about 3 more applications of stripper and a lot of sanding, but I finally got it down to the bare wood. There were a few pesky places that didn't want to come up, but that actually made it look kind of cool.


Once I got it down to the bare wood, I stained it with a Dark Walnut stain and then put 2 layers of poly on it! Now the top is nice and smooth!


For the rest all I did was spray paint the bottom half with this fun Valspar color and then distress and glaze it to give it a shabby look!


I really like the way it came out and I think it will hold up this time! I am glad I took the time to do it the right way!


Linking to:
http://www.reinventedkb.com/2010/05/trash-to-treasure-tuesday_24.html


http://somedaycrafts.blogspot.com/2010/05/whatever-goes-wednesday-14.html

http://www.somewhatsimple.com/


Wednesday, April 21, 2010

Versatile Shutter decoration

Old houses come with some interesting issues.

One of mine happens to be this long, narrow bathroom with amazing pink tile and only one outlet !!!
It also has this big white wall that I have yet to figure out what to do there.

Until now!


I have had this old shutter for awhile. Originally I just had it standing in a corner, but I figured I could do something more creative with it!


With some paint, a little glaze, and the use of my new Jig Saw

(thanks Dad)

I was able to turn it into this....


Hobby Lobby had their knobs on sale so I added those and figured I could use them for jewelry...

For towels...
Or for something else yet to be discovered!
I think it works!


Posted by Picasa

Tuesday, April 13, 2010

Easy flower arrangement knock-off

I saw this in my Real Simple magazine this month and thought it was pretty cool.
What wasn't cool was the price tag...
That's three hundred sixty five big ones if you missed it!
I figured I could make a smaller version for a fraction of the cost.
Off to the local Ikea I went and found these bud vases for $3 each.
I just used gorilla glue to put them together and voila!

Doesn't it make the flowers look awesome!

One day I may get around to putting the whole thing on a plate or even painting the vases a different color, but I was in a hurry. I could also add more vases to it if I wanted, but our table is so small, anything more would be a little overpowering!

Do you like it?

Posted by Picasa

Thursday, April 8, 2010

Beaded Wire Cross

Here's a fun and easy craft...

All you need is a mix of fun beads, some beading wire, a couple of markers/pencils/dow rods or any thing that shape will do!

Start by making a cross with the markers or pencils. Depending on how big you want the cross is how you decide which to use. The one below was made with crayola markers.

Wrap some wire around the center of the cross to secure it, but not too tight because eventually you will want to remove them.
Once the middle is secure, just wrap wire around the rest of it. until you have a good base. Once you have a good foundation, you can begin just adding beads as you wrap.

Once your cross looks like you want it to, push the markers out of the holes at the top and there you have it. In some cases you could leave them, as long as it can't be seen through the wire.

Use left over wire to make a hanger. Now that I look at it, I should probably use a ribbon to hang it- wouldn't that be pretty!


This is a great way to use all those left over beads from various projects!
Enjoy!

Posted by Picasa

Monday, April 5, 2010

Cake Eggs!

I've posted this before, but with Easter around the corner again, I figured I would repost! Happy Easter everyone!


Have you had Cake balls before? How about cake eggs?
I made these for an Eastger brunch! They were a big hit and really fun to make.
The Pioneer Woman has a good step-by-step recipie on her site, I just modified it to fit the holiday!


Posted by Picasa

Tuesday, March 30, 2010

Metal Art


This project can be time consuming, but it is easy and really makes a great gift.
All you need is a roll of soft metal found at Hobby Lobby and comes in sliver, copper and gold (I like the copper myself), a paint pen (the thin ones usually work best for script) and an embossing tool- not sure on the technical name for this


Begin by cutting your metal to fit a chosen frame, then print out a copy of a favorite scripture, quote or picture that would fit on the metal.


Tape the copy over the metal and then use the embossing tool to trace over the letters. You have to press down pretty hard. Depending on the font you use, it can take awhile! I also put a piece or 2 of craft foam behind the metal to give it some cushion.


Once you have traced the letters, remove the paper. You should be able to see the writing pressed into the metal. At this point, go over the letters with your paint pen. If you mess up, you can use paint thinner or mineral spirits to erase the paint, it shoudn't stain the metal.


I then place the metal in a frame. This is a great way to use those frames that are oddly sized or too overpowering for an actual picture. Most of the time I put the glass behind the metal before I put the back on to give the metal some stability.


Here are a few examples of other ones I have done. Sorry about the poor quality of the pictures. One day I will have an awesome camera!


Posted by Picasa