Search This Blog

Saturday, December 31, 2011

Easy felt bunting banner


For my roommates Birthday, I made this easy felt banner.

Basically, I cut some triangles out of felt and sewed them on to some thick bias tape.
Then I cut the letters out of felt and just stuck them on to the flag.

I didn't sew those on because I figured I can re-use this banner for all sorts of occasions. Just cut out more letters to say things like "Happy New Year", "Celebrate"... anything really!


I think it added a lot of fun to her day!


Posted by Picasa

Thursday, December 29, 2011

More Metal art

For Christmas, my Mom asked me to make something she could give to her co-workers and a couple of close friends.

We settled on one of my past projects. These are made from soft metal, pressed in with an embossing tool and then filled in with a paint marker.


I think she was happy with the way they turned out.


For more examples of this you can check out this post!
Posted by Picasa

Monday, October 10, 2011

Cake Stands

This weekend I helped in putting together a fundraiser of sorts for a Baby orphanage I visited while in Kenya last summer. The lady who started the orphanage was actually a member of my church, but she moved to Kenya about 5 years ago. Not only does she run this orphanage, she also has a ministry to the local hospitals, and some single mothers. You can learn more about her ministry here.

The single mother ministry is what we were focusing on this Saturday. To support themselves and their families, the women are taught how to knit and sew. Trena works with the mothers to advertise their products and since she has been in the states, she is trying to sell as much merchandise as possible for them! That’s what Saturday was about. Come, eat and buy!


We decided early on that we would serve a little cake, fruit and tea. Nothing too big, just a nibble! And for decorations, it would mainly be just things we had on hand, plus some fun fabric for the table. I was in charge of making cake platters since we needed some height on the table.

The fabric that was chosen was hot pink zebra stripes and a little bit of hot pink and green floral. I wanted to match the fabric, but not be overly matchy-matchy either!

These were actually really easy to make and cost a total of $17 for 3 stands. The way they were put together allows for them to be taken apart for storage and could be repainted to match any event.

Here is what I did:

1. Buy 3 wooden plaques- Hobby Lobby

2. Spray paint them white

3. Buy 3 candle sticks of various heights (I already had 2 I found at goodwill) the other was from HOB LOB

4. Spray paint them whatever color your heart desires!

5. After the tops were dry, I wanted to make them a little more festive. I grabbed some fun scrapbook paper – in zebra print and houndstooth, and modge podged them to the tops. 2 coats of m.p was all it took.

To put the stands together, I first drilled a small hole in the tops and the sticks. That way when I screwed them together, the wood wouldn't split.

7. At first, I was just going to leave it, but they were a little top heavy, so I also added a small base to each stand. That made them a lot more sturdy. I had these 3 pieces of wood already so that was nice. But you can buy them at Hobby Lobby also if needed.


I think they turned our pretty cute!


In case you are wondering, those are miniature bundt cakes from "Nothing Bundt Cakes"! If you have a store close to you, I highly recommend them- they are delicious!


Here is the whole table!

The event was great, we raised a lot of money and had a wonderful time hearing about what the Lord is doing in Nukuru through His Cherished Ones Ministry .

Items for sale made by the Ladies


Posted by Picasa* I link my projects to the following blogs whose links you can find on my side bar
- Todays creative Blog
- Someday Crafts
- Somewhat simple

Thursday, September 22, 2011

Burlap Hoop Wreath


I haven't done anything crafty since the dining room re-do so I was getting a little antsy!

On a weekend trip home, my grandmother insisted I come for a visit because she had something she wanted to give me. I wasn't sure what she was going to pull out for me, but boy was I surprised when she handed me this old box of giant plastic buttons!


Not only were there about 100 buttons in the box, but they were such fun colors and so big that I knew I could do a lot with them! I was thrilled. Honestly, as random as it is, I think it was one of the best presents I have received from my Grandma; Mainly because it proved she knew me well enough to know that I would appreciate something like that!

I took the buttons home and knew I needed to use them right away! It just so happened that 2 of my best friends are about to celebrate their 30th Birthday, so that was the perfect excuse to spend some time crafting.


I have seen lots of wreaths and decorations using those crochet hoops so I thought I would jump on board!


I wanted the texture of the burlap on the wreath, but also needed something more sturdy when sewing, so I put a piece of linen behind the burlap.


I sewed on the buttons, and then used a back stitch to sew the letters and stems on the flowers!

I added some ribbon to hang them with and viola! I think they turned out really cute!

Later, I went back and spray painted the hoops a bright green color.

Happy Birthday Lori and Emily! And thank you Grandma for the awesome gift! I'm sure there will be many more projects using these buttons in the future!


*What would you use the buttons for? I would love some suggestions!


Posted by Picasa

Friday, August 26, 2011

Shameless

I entered my bench project in a contest. The winner gets a gift card from American express. I would be honored if you would take a few minutes to go here and vote!

As a thank you, every time you vote, you will be entered to win a 6-pack of Krylon spray paint! A new winner every week. Can't beat that!

Thanks so much for your support!


Also, I entered this contest. I am a little intimidated, but I think I'm up for the challenge!


Tuesday, August 16, 2011

Dining Room Re-Do

Something got into me on Friday night and I just had to do something about this orange disaster of a room!

I have been living with this color since we moved in and have always hated it. Not only is it orange (and I'm an Aggie), but the room itself has almost no natural light so it was always so dark in there. The table is basically a dumping ground for mail and other junk and the coat rack was overflowing with jackets and random hats that only get used during rodeo time!


I've been wanting to get on the grey-train for awhile so I went to Lowes, picked out a color and went with it. Honestly, I spent about 5 minutes looking at paint samples before I just picked one. Hardly any thought at all. And I actually really like the color. It has a little bit more blue than I wanted, but because the lighting is so bad in here, I really don't think any color will be true so no biggie.


Once I had the grey on, I knew it needed a little something more, so I painted on some stripes! Now the room is beginning to shape up!


Sorry the lighting/pictures are so bad, just take my word for it- it looks great!

To add some brightness to the room, I went with yellow accents! I threw together some curtains for the oddly placed window, bought some flowers from Hobby Lobby (1/2 price of course) and put them in my Ikea vases. I also took some leftover fabric and cut some napkins for the table.


I also spray painted the ugly brown coat rack a sunny yellow- I don't want to hang anything on it now! I also found a hanging basket at Hob Lob for $5- sprayed it grey and now we have a place to put the mail instead of the table.

Maybe we will actually eat here now!


The room is so much brighter now! I really love it. Not too bad for a weekends work!

The paint colors are Urban Sunrise and tempered grey from Valspar
The Yellow is Marigold spray paint, also from Valspar


Saturday, July 9, 2011

Headbands for Orphans

Last Summer I got the incredible opportunity to travel to Kenya with some people from my church. We went for 2 weeks to be exposed to the culture and to minister to some children in orphanages there that our church supports.

It was an incredible time that changed so many things about how I want to live my life. The main orphanage that we spent most of our time in was called Eden Orphanages. It is a small orphanage that was started by a farmer from Waller, Texas. 
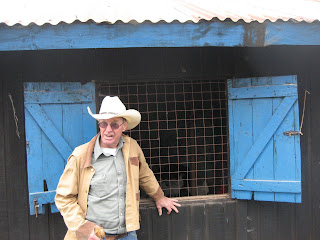
Mike and his wife Sylvia have spent the better part of their marriage investing in the lives of children half a world away. Mike, despite his recent battle with brain tumors, still makes bi-annual trips to Africa to oversee the orphanages' operation. He is using his knowledge of farming to help teach the kids and workers how to plant vegetables, raise cattle, rabbits and chickens. By doing this, the orphanage is virtually self-sustainable. Whatever is not used for the children, is sold to pay the salaries of the matrons and other workers.

I was in awe of these kids and after hearing some of their stories of where they came from and the conditions they were living in, I couldn't believe they still had these beautiful smiles! I truly saw the joy of Lord in them.


As much as I wanted to go back this year, my job would not allow it this summer. I wanted to send a little something for the girls and had an idea! The girls over there are not allowed to have long hair when attending school. In fact, they have to shave their head because of lice, lack of water and other factors. I noticed that some of the girls had these little head bands, just plain fabric they would tie around their heads. I figured I could do something like that, but add some girly-ness to them. What little girl wouldn't love a colorful, flowered headband?!

The orphanage has taken in a few more girls since I was there so I had to make 36 of them. It was a labor of love, but one that will hopefully bring a little smile to their faces.

I purchased the cloth headbands and started off by cutting 36 circles out of fabric scraps I had.


Sew around the circle with a basic needle and thread


When you get all the way around, pull the thread to gather the fabric together and then sew the middle to secure it.


Sew the flower onto the headband. I just placed it on the seam that was already on the headband.

To add some more fun, I hot-glued a button in the middle.


I then packaged them all up and off they go with the team of people leaving in a few days!


They look really fun hanging on my hall mirror! I can't wait to see how they look on all those precious heads! Hopefully I will get some pictures!


Posted by Picasa

Friday, May 27, 2011

It is Finished!


Remember this big guy I snatched up for free at the Houston Re-Use Warehouse?

Well, a few thousand staples and 4 yards of fabric later
It now looks like this...


I am really proud of how it turned out. Not only was this my first attempt at hard core re-upholstering, but I can honestly say it has been my toughest project to date.

Just to get to this, took me 5 hours... not to mention gave me some massive blisters!

I had to do a lot of research to even know where to start, but thankfully the blog world had lots of tutorials out there!
Plus, the place I bought all my supplies online had some super cool, and by cool I mean outdated but full of information, videos!
The sides were the toughest part. This is definitely not perfect, but for my first time and on a free chair, I think it's great!


One of the best parts of the project was that it forced me to purchase an air staple gun and air compressor! I have been wanting a reason to get those and since this would have been impossible with out it- I finally bit the bullet!


Here is where it sits as of today. I am not crazy about it next to the zebra chair, but I'm going to live with it for a little bit. I am also working on a stool, turned ottoman to go with the new chair. Hopefully that will be up soon!


Here are some details about the supplies I purchased from www.DIYupholsterysuppy.com


Upholstery Tacking Strip, Metal, 27" Each3 $0.45 $1.35
27 Bonded Dacron / by the yard4 $2.75 $11.00
Upholstery Tack Strip/Cardboard1 $3.99 $3.99
Upholstery Supplies, Ply Grip by the running foot5 $0.38 $1.90
They were by far the most reasonably priced and you could buy what you needed without having to purchase large quantities of stuff. Shipping was a little slow, but other than that it was great!


The fabric is from a local fabric warehouse here in Houston.

I hope you all like the chair. It was tough, but so worth it. Really all it takes is a lot of patience. Oh, and about a thousand staples..but I already told you that!


* I link my projects to the following blogs whose links you can find on my side bar
- Todays creative Blog
- Someday Crafts
- Somewhat simple

Posted by Picasa